Using QUESTIONSTAR to Conduct Tests
Using QUESTIONSTAR to Conduct Tests
You can use the QUESTIONSTAR platform to create and launch tests. This is just as easy as conducting surveys.
To launch an online test, please follows the steps below:
- Set up your questions and assign values for correct answers.
- Create a correct answer matrix for passing the test.
- Create pages with messages about passing or failing the test.
- Display the points (score) earned by the respondent (if necessary).
- Create a page with correct answers (if necessary).
- Allow the respondents to view their answers.
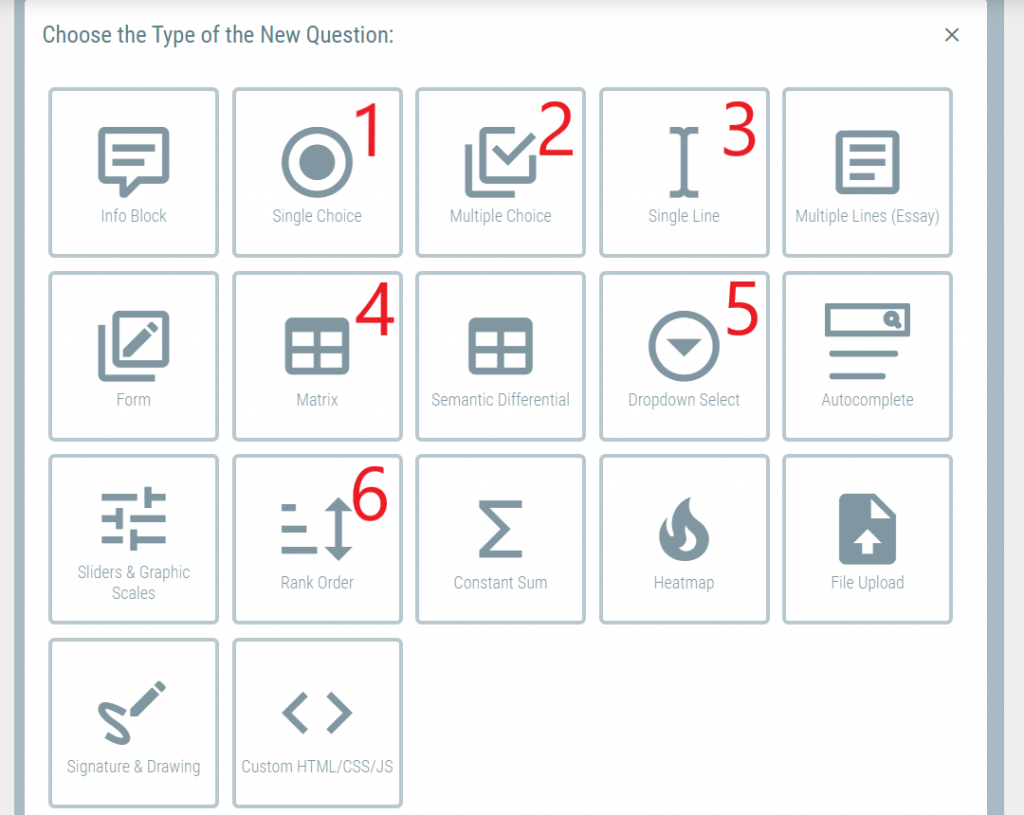
You can use the following types of questions for pass/fail tests:

- Single Choice
- Multiple Choice
- Text Input Check
- Matrix
- Drop-down Select
- Rank Order
The following types of questions can be used for graded tests:
- Single Choice
- Multiple Choice
- Text Input Check
Examples: a) graded test and b) pass/fail test
1. Test Setup on QUESTIONSTAR
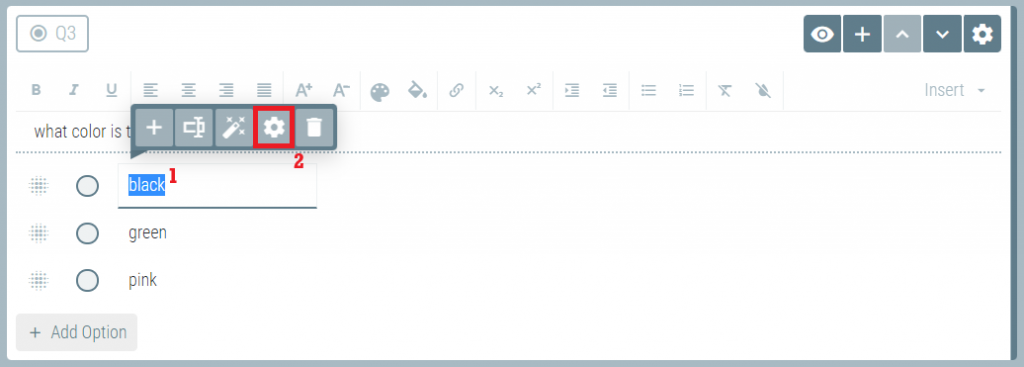
1.1 For a single-choice question, set the correct answer to “1” and the wrong answers to “0” (zero). You can do this via the answer settings menu.
For correct answers:


For incorrect answers, the code should be set to zero.
1.2 For multiple-choice questions, additional settings are not required. Each option will automatically return a “1” if selected or “0” if not selected.
1.3 If you need to check whether or not correct text was typed in, create a question with a text field, set up the text check option, and assign points for the correct answer.
A simple text check uses the correct answer matrix (see below) and does not require additional customization.
If you want to calculate the points assigned for the correct text input, additional steps will be required to set up your online test. Please see the end of this page for more details.
When adding a single line text input question, make sure to give it a name (1) in Latin characters (for example, “testQ4”; you need to use different names for different questions):

You don’t need to add the correct value in the actual test; all answers will be checked in the response matrix or by using a special code if you need to assign points for correct answers.
2. Setting Up the Correct Answer Matrix
Please follow the steps below to create and set up the correct answer matrix:
a) Create a page that will be shown after completing the test.
b) Set up the conditions for showing this page.
c) Add redirection to the End of Survey from this page.

(1) To make it easier to navigate, give this page a plain name and mark it as the “End of Survey”, so that the responses of all respondents redirected to this page will be marked as completed.

(2) Set the display logic for this page to Display Page.
(3) Set up the terms for correct answers.
(4) When adding the terms for the following questions, make sure to use the “and” logic so that your test will be regarded as passed if correct answers have been given for all the questions (1 and 2, and 3, and 4…).
(5) For matrix questions, you need to use numerical identification instead of selected text answers to set up the terms.
(6) Set the branching logic to go to the End of Survey after this page.
(7) Add one Info Block question on this page and write a congratulatory message for those who successfully passed the test.
3. Setting Up the Pages with Answers
If your respondent has provided correct answers to all the questions, they will see a page with a congratulatory message, and after clicking the Next button on this page, they may be either shown a service message or their answers or redirected to your website (a few more options are available). These options can be customized on the End of Survey tab in Survey Settings:

Next, you need to set up a message for those who failed the test.
- Create a page that will be shown to those respondents who have not been able to answer all the questions correctly (they won’t see the “correct” page).
- Use an Info Block question and insert the relevant text.
- If necessary, you can also show them the correct answers. To do this, create an Info Block question and insert the correct answers as a text message.
After that you can show the respondents their answers.

4. Calculating Test Points
We would like to remind you that three type of questions work best for graded tests:
- Single Choice
- Multiple Choice
- Text Input
- Matrix
To calculate total points, create a variable in Analyze Results (1).

Go to the report edit mode (2), select a variable (3), and click Edit (4).
Each test question will return a numeric value that can be used to calculate total points. To do this, you need to create a formula (5), where the q-variables stand for test questions.
For ease of use, we recommend adding question numbers or correct answers to the variables, for example, q1 − correct answer to question 1, q21 and q24 − correct answers to question q2? that have been assigned value “1”.
In single-choice questions, the values that have been manually customized by you will be used in the formula, similar to text check. For multiple-choice questions, the selected option is always equal to “1”. For matrix questions, the system will return the value that corresponds to the sequential number of the column.
5. Calculating Points Earned for Text Input
Show settings
When adding a single line text input question, make sure to give it a name (1) in Latin characters (for example, “testQ4”; you need to use different names for different questions):

Create a service (hidden) single line text input question and assign it a name in Latin letters (2). Make sure to switch the input data type to “number” (3):

Next, create a code question and insert the following code in the JS tab:

Please note how this code can be adjusted for your test:

where:
(1) testQ6 is the service question (you may use another name in your test).
(2) testQ4 is the question that is being checked (you may use another name in your test).
(3) The correct text that is being checked.
Keywords: create a test, create an online test, conduct a test, create a test online, use the survey tool to create a test online, hold a test among friends, graded test, how to create a test step-by-step guide.
