
Connect the QUESTIONSTAR MCP with ChatGPT
Step-by-step guide for ChatGPT (Plus/Team/Enterprise, with custom-plugin support). ChatGPT Free does not support custom plugins — a Plus or higher plan is required.
Requirements
- An active QUESTIONSTAR account — already signed in in your browser (with the exact account you want the AI client to connect to)
- ChatGPT Plus/Team/Enterprise with custom-plugin access
Set up the connection
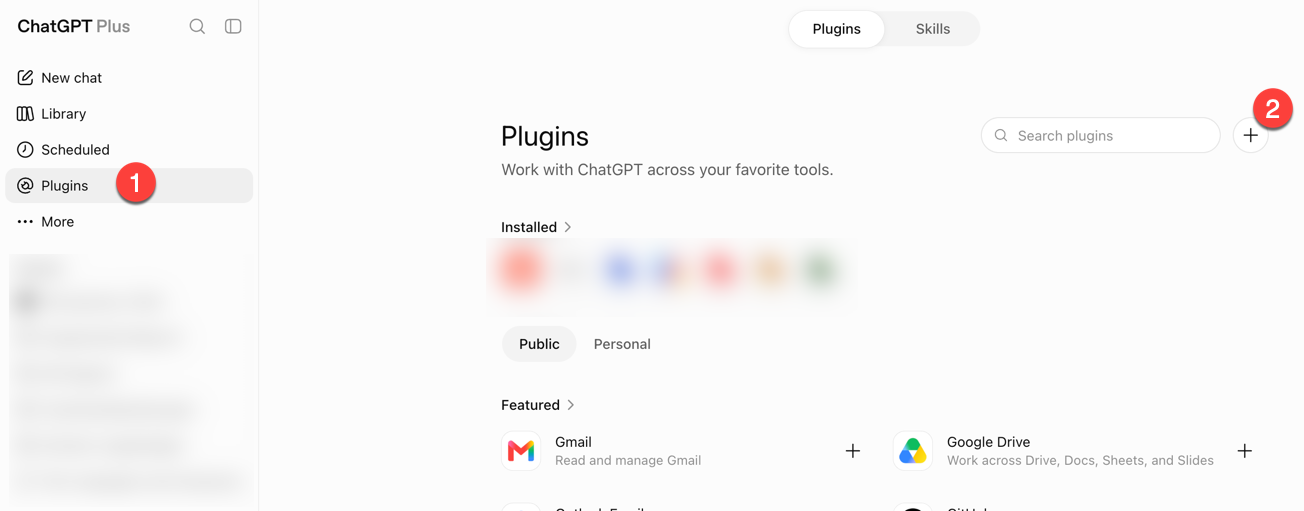
- Open ChatGPT and choose Plugins in the sidebar.
- Click the + (New Plugin) at the top right.
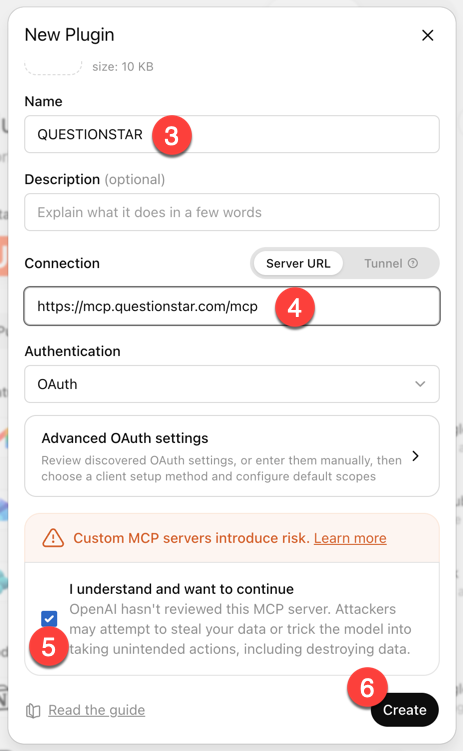
- Under Name, enter: “QUESTIONSTAR”.
- Under Connection (Server URL), enter:
https://mcp.questionstar.com/mcp. - Confirm the notice with the I understand and want to continue checkbox.
- Click Create.
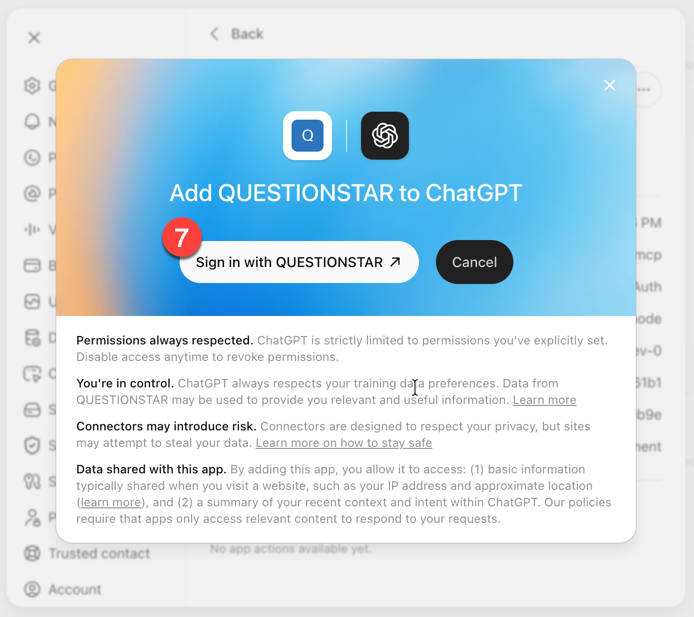
- In the next dialog: Sign in with QUESTIONSTAR.
Not signed in? The QUESTIONSTAR sign-in page opens first. Sign in, then click Sign in with QUESTIONSTAR again — the second click completes the MCP connection.
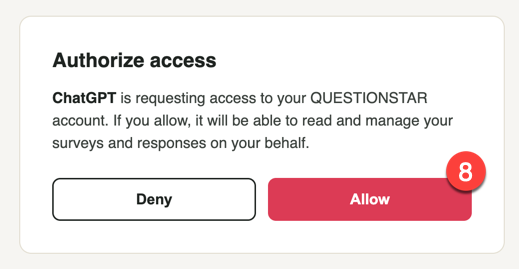
- In the QUESTIONSTAR dialog: Allow, to give ChatGPT access.
QUESTIONSTAR is now available in ChatGPT. Invoke the plugin actively — via the plugin picker or by name in the prompt, depending on the mode.
First prompts to try
- “Show me my surveys” — a quick inventory.
- “What can I do with QUESTIONSTAR via the MCP — and how can you help me with it?” — the AI client tells you itself which tools are available. Especially useful when you’re just starting out.
For more ideas — and some surprisingly useful applications — see the “Unexpectedly useful” section of the MCP overview.