
n8n
Install the QUESTIONSTAR Community Node in self-hosted n8n, connect both systems via OAuth, and use survey data in your workflows.
Installing the QUESTIONSTAR Community Node in n8n
If you host n8n yourself (on your own server rather than in the n8n Cloud), you first need to install the QUESTIONSTAR Community Node. After that, you can build automations with your surveys and survey data from QUESTIONSTAR.
This guide walks you through the installation step by step.
Important: Installing the QUESTIONSTAR Community Node in n8n requires administrator rights.
If you don't have administrator rights, please forward this guide to your n8n administrator so they can set up the QUESTIONSTAR integration for your account.
Here's how to do it
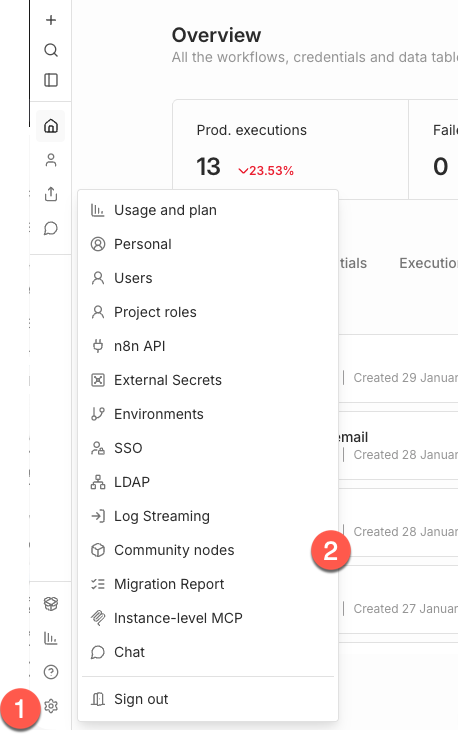
Once you're logged in to your n8n account:
In the bottom left, click the Settings button (gear icon). The Settings menu opens.
In the Settings menu, click Community nodes.
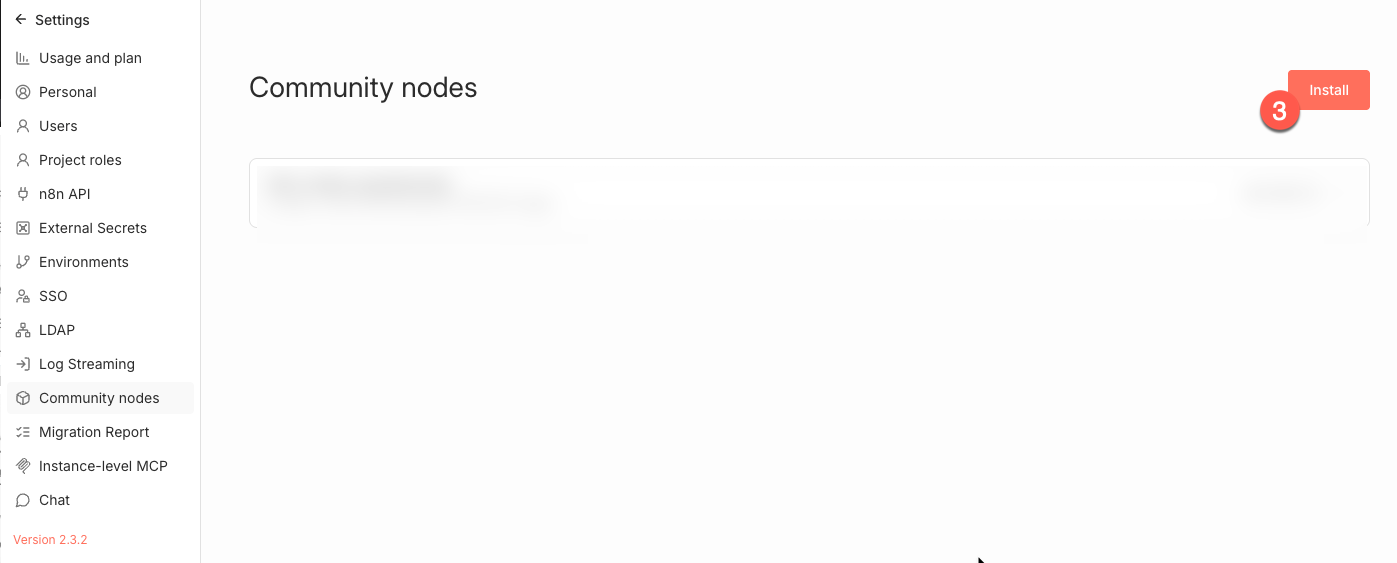
In the top right, click the Install button. If you haven't installed a community node yet, the button Install a community node appears in the center of the screen instead — click that one.
The Install community nodes dialog opens. In it:
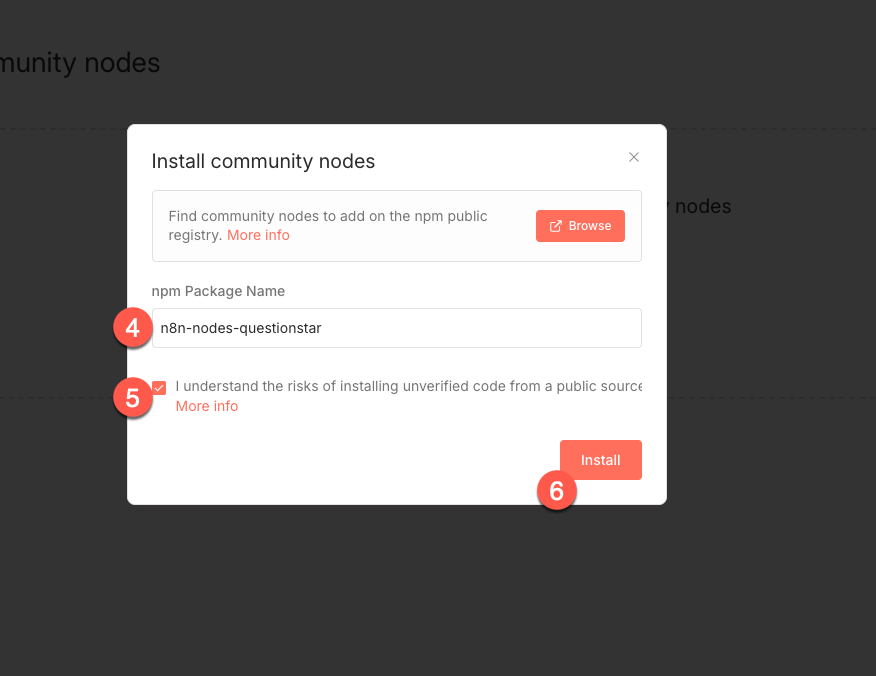
Enter n8n-nodes-questionstar in the npm Package Name field.
Select the checkbox confirming that you acknowledge the risks of installing third-party code from a public source.
Click Install to complete the installation.
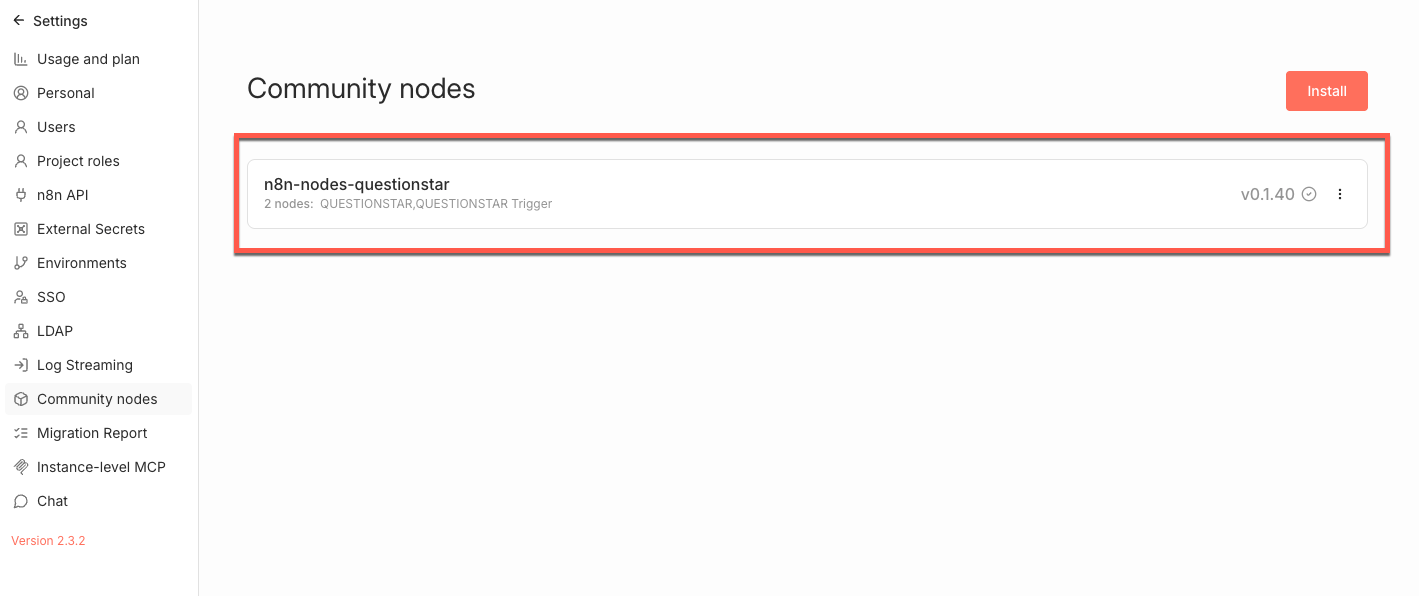
The installation is complete.
The QUESTIONSTAR Community Node is now available in your organization. You can use QUESTIONSTAR data in your automation workflows right away.
Connecting n8n and QUESTIONSTAR
Before you build automations in n8n, you need to connect n8n to QUESTIONSTAR.
In this step, you set up OAuth authentication between n8n and QUESTIONSTAR. This lets n8n access your survey data securely.
You only need to set up the connection once — after that you can reuse it in as many workflows as you like.
Note: The setup involves several steps where you switch back and forth between n8n and QUESTIONSTAR.
Please follow the steps carefully and in the order given.
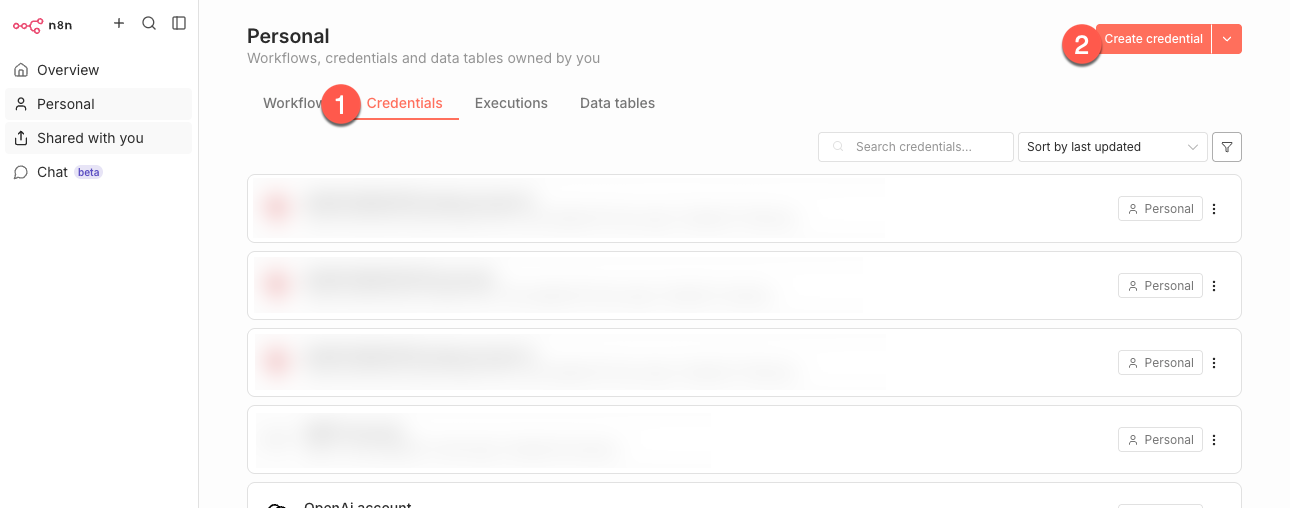
In your personal dashboard in n8n
Switch to the Credentials tab.
Click Create Credential.
In the Add new credential dialog, find the QUESTIONSTAR OAuth API for your region.
IMPORTANT: Users in Europe select QUESTIONSTAR Europe OAuth2 API.
Choosing the wrong region API will cause the connection to fail.
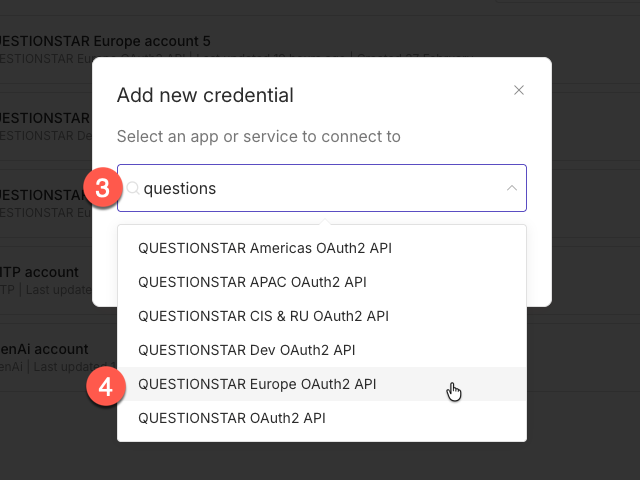
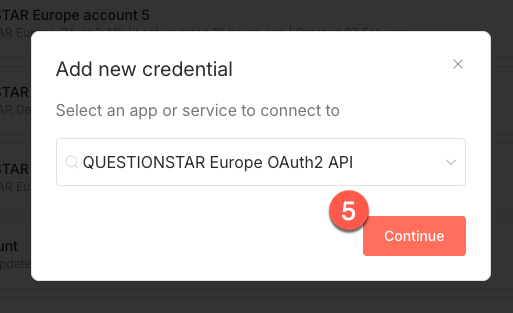
In the Add new credential dialog, start typing questionstar.
Select QUESTIONSTAR Europe OAuth2 API.
Click Continue.
In the next step, you connect n8n and QUESTIONSTAR via OAuth credentials. This gives n8n secure access to your survey data.
IMPORTANT: In the following steps, you switch back and forth several times between n8n and QUESTIONSTAR. Please keep to the exact order.
You copy the OAuth Redirect URL from n8n into QUESTIONSTAR, and then the Client ID and Client Secret from QUESTIONSTAR into n8n.
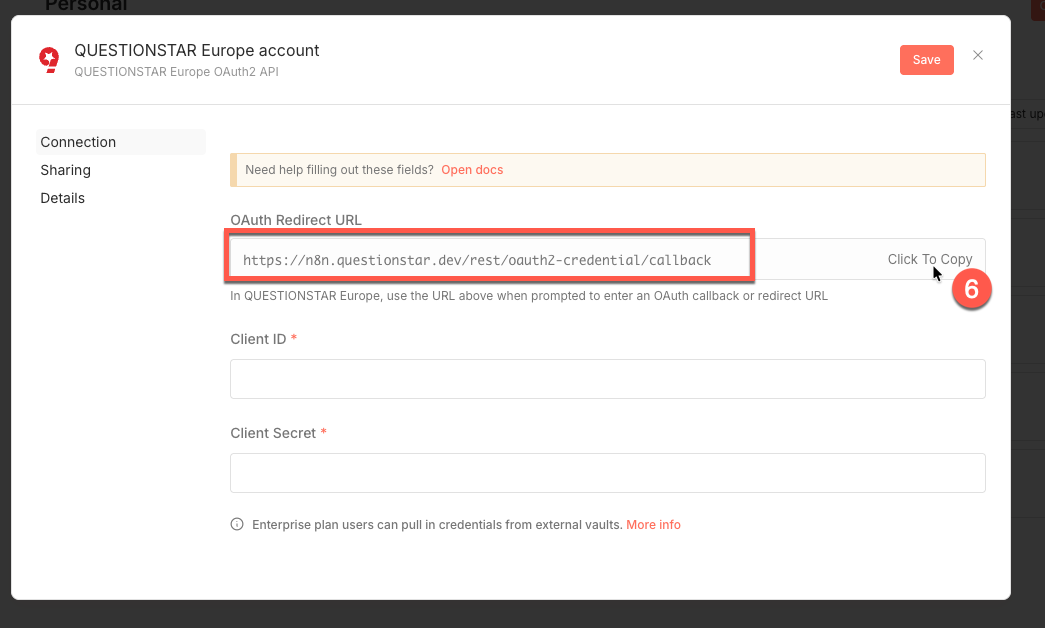
In n8n, copy the OAuth Redirect URL.
Now log in to QUESTIONSTAR and open the n8n integration page
In QUESTIONSTAR:
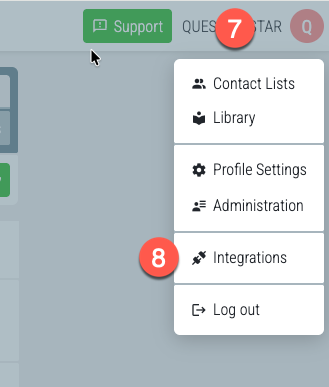
In the top right, click your name.
Select Integrations.
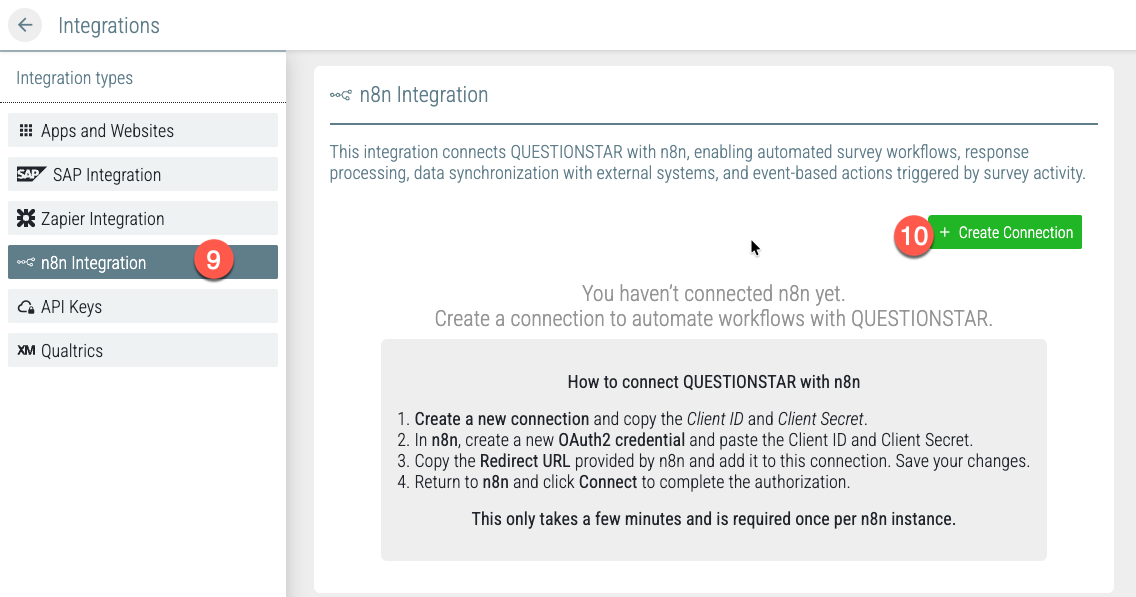
In the left-hand navigation, select n8n Integration.
Click Create OAuth Connection.
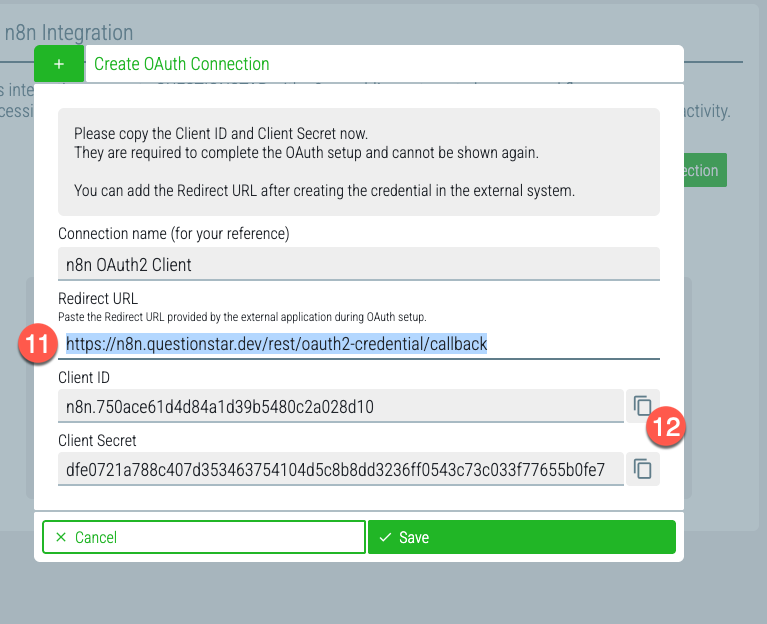
Paste the Redirect URL you copied from n8n in step 6.
Copy the Client ID. Use the copy button to the right of the field.
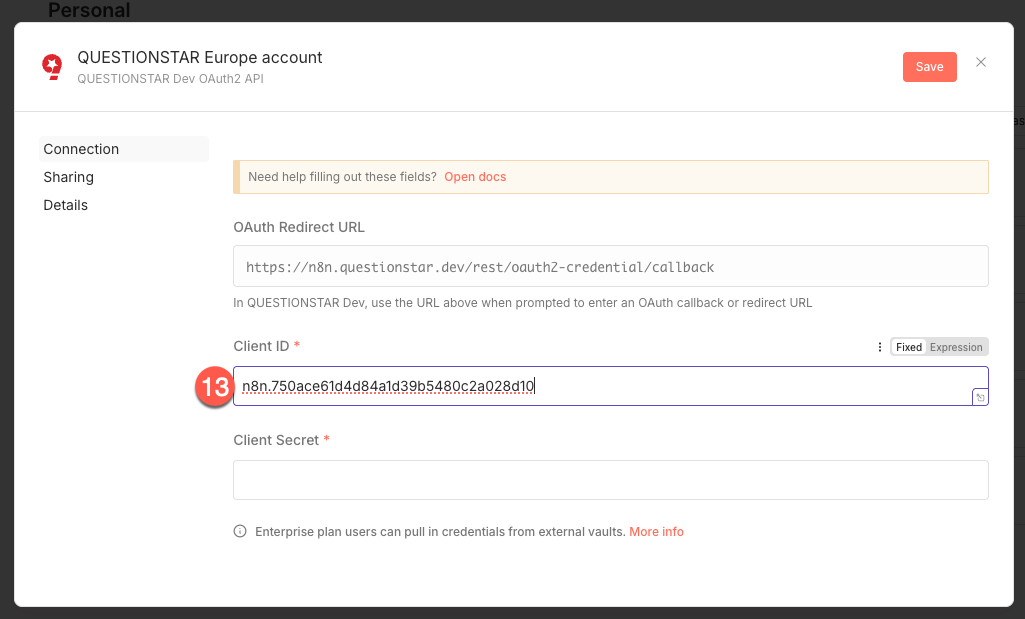
Switch to n8n and paste the Client ID you copied from QUESTIONSTAR in step 12.
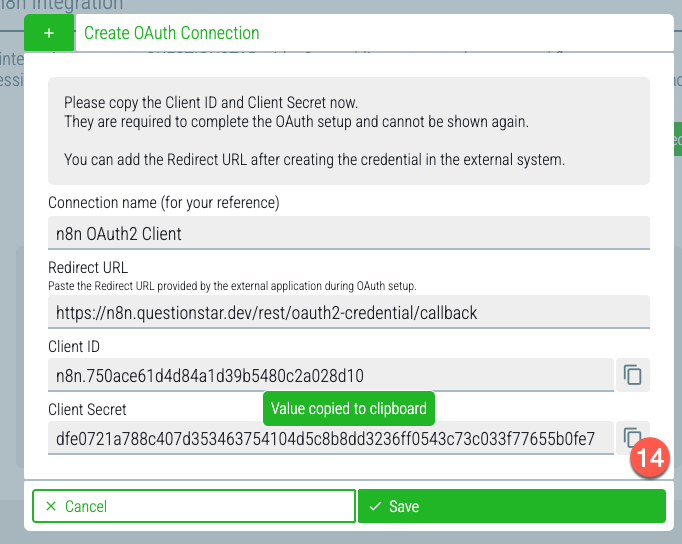
Switch back to QUESTIONSTAR and copy the Client Secret. Use the copy button to the right of the field.
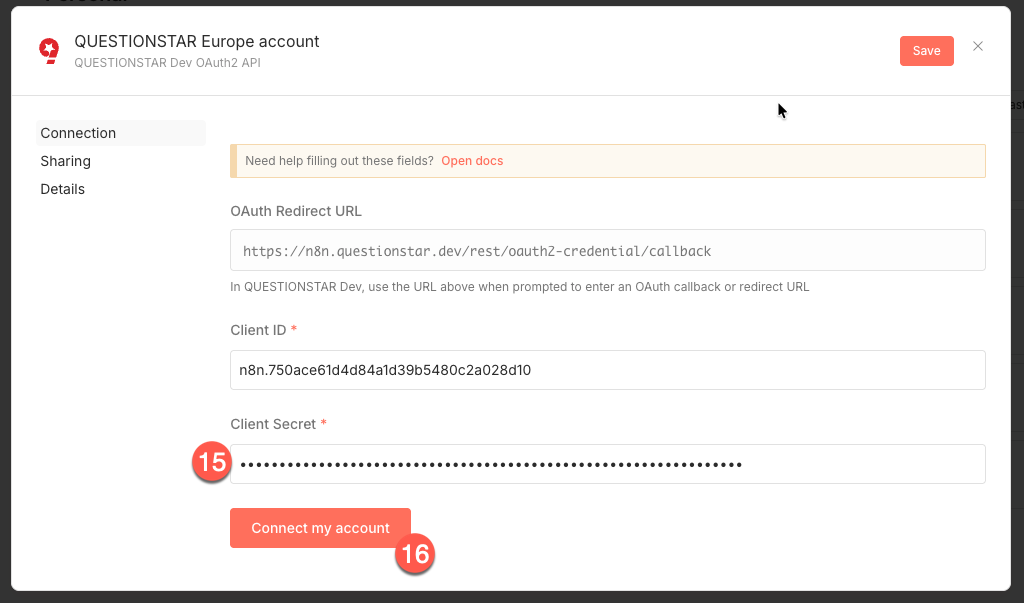
Switch to n8n and paste the Client Secret from QUESTIONSTAR.
The order of the next steps matters!
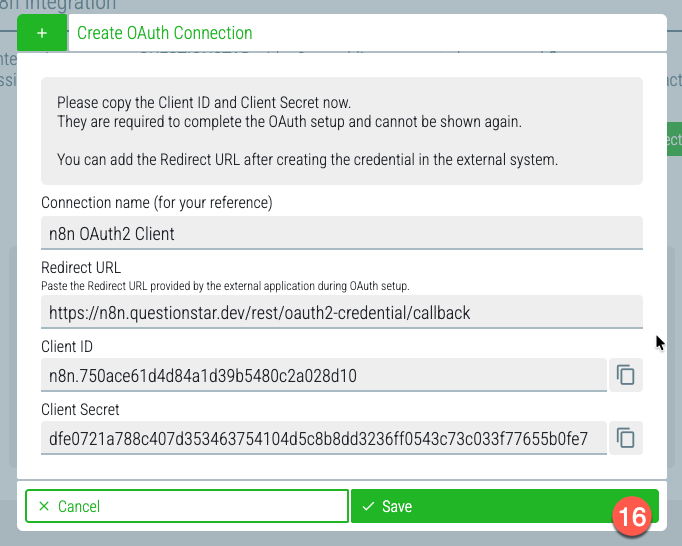
Switch to QUESTIONSTAR and click Save. This saves the authentication data in QUESTIONSTAR.
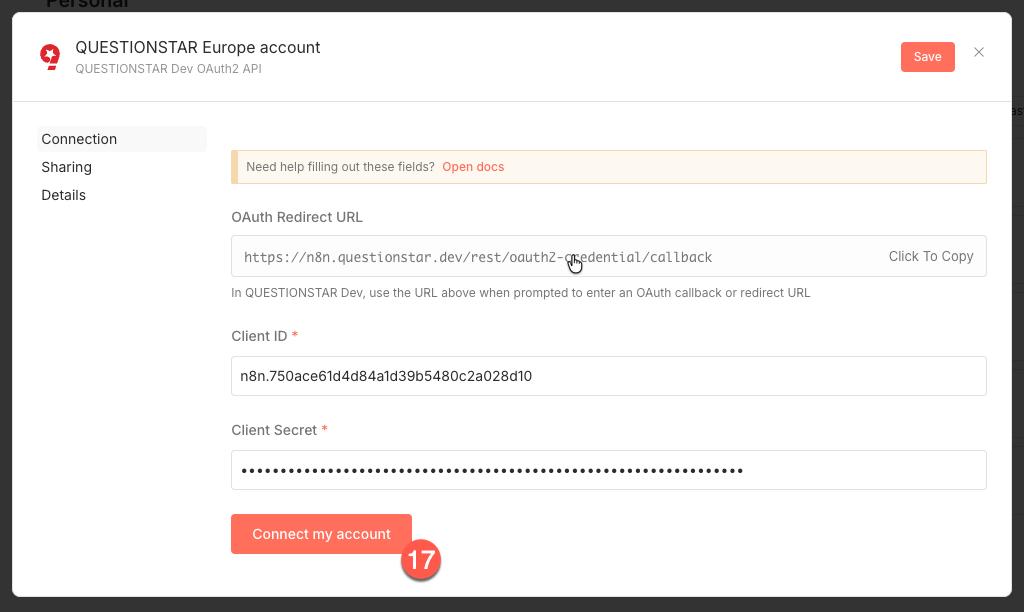
Switch to n8n and click Connect my account. This saves the connection data in n8n.
If every step was done correctly, a small window opens confirming that the connection between n8n and QUESTIONSTAR was established successfully.
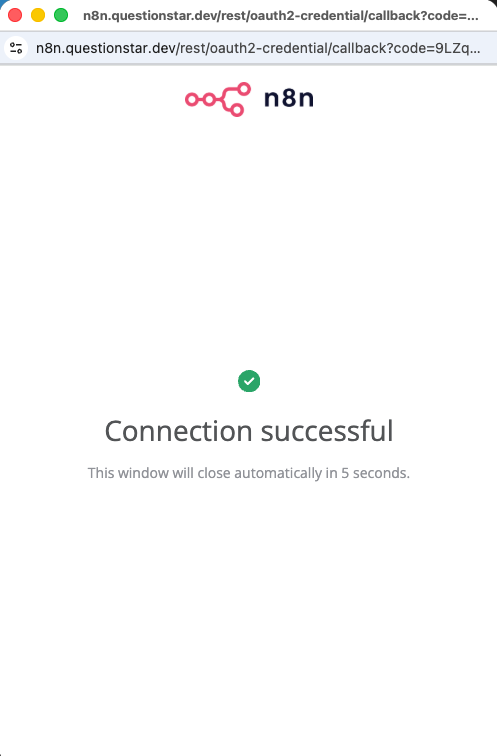
If an error message appears instead, the connection failed. In that case, repeat the entire connection process from the beginning.
In that case, check whether:
- you chose the correct region API in step 4
- the Redirect URL, Client ID and Client Secret were copied in full
- no extra characters (e.g. spaces) were copied along with them
- you used the copy buttons wherever possible
- the credentials were saved in the correct order (steps 16 and 17)
Result
The connection between n8n and QUESTIONSTAR is set up. You can use these credentials in any n8n workflow.
Using QUESTIONSTAR in n8n workflows
To use QUESTIONSTAR in your n8n workflows, create a new workflow or open an existing one. Then:
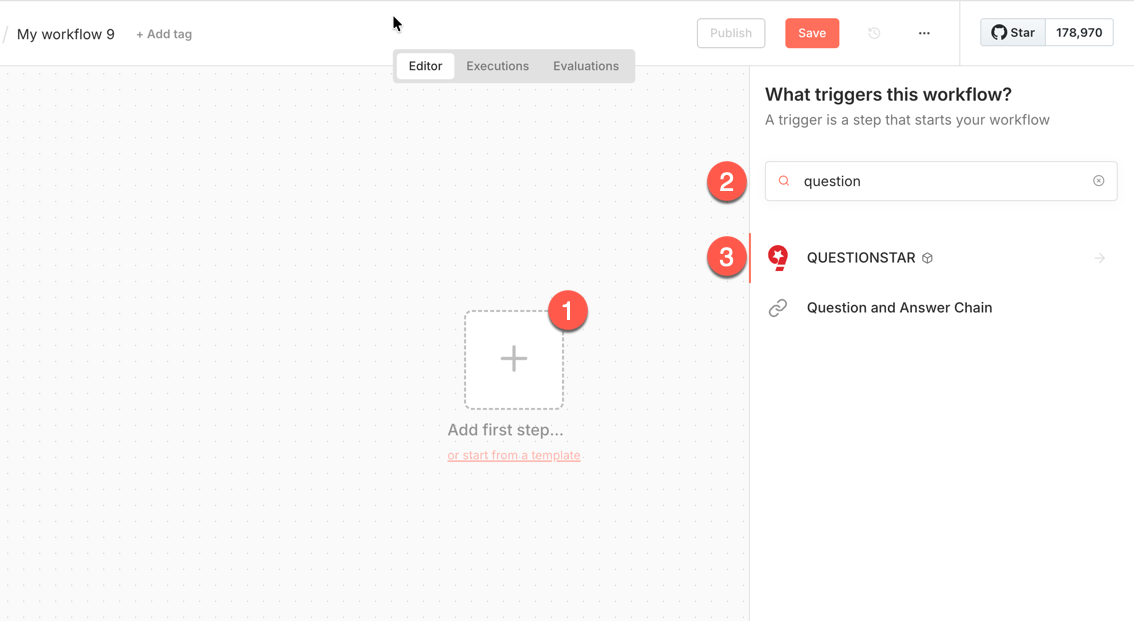
Add a new step to your workflow.
In the right-hand panel, start typing "questionstar".
Select QUESTIONSTAR from the list of available nodes.
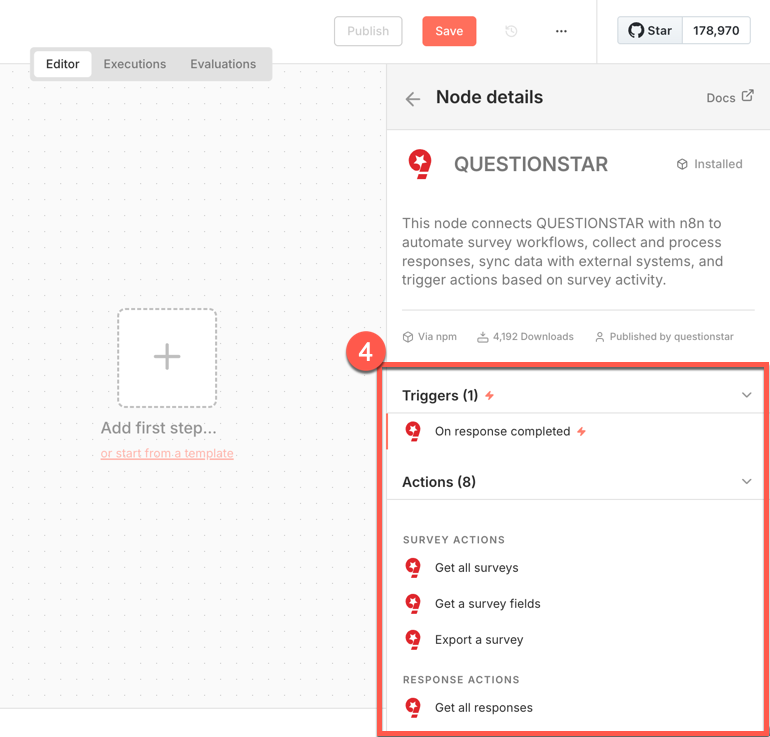
Select the QUESTIONSTAR Trigger or one of the available actions.
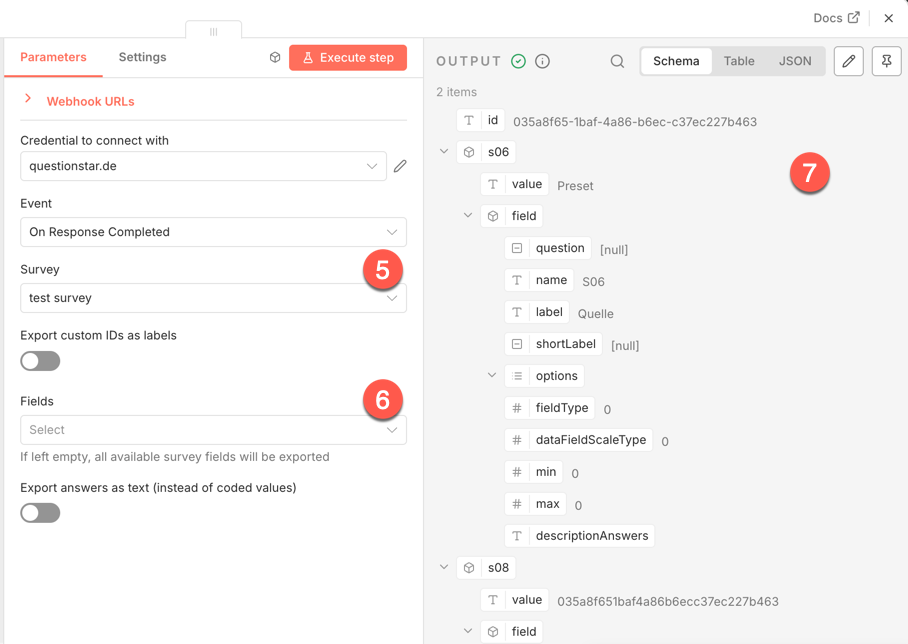
Select the survey whose data you want to use.
If needed, select the fields you want to work with.
Check the preview to confirm the data loads correctly.
Done.
You can now connect the QUESTIONSTAR node to other services, for example:
- email notifications
- Google Sheets
- Slack or Microsoft Teams
- CRM systems
- AI agents and chats
Coming soon:
- ready-made workflow templates