
Qualtrics
Move existing surveys and response data from Qualtrics into QUESTIONSTAR — step by step, using .qsf and .csv export/import.
About importing from Qualtrics
With the "Import from Qualtrics" feature, you can move existing surveys and their response data into QUESTIONSTAR quickly and easily. Both the survey structure (in .qsf format) and the response data (in .csv format) are supported.
This feature is especially useful when you want to bring over your previous research projects or customer data from Qualtrics and keep working with them seamlessly in QUESTIONSTAR.
Note: During import, all content that can technically be imported is carried over.
However, because there are differences between the question types and logic of Qualtrics and QUESTIONSTAR, some elements can't be fully carried over.
So after the import, check your questions, answer options and logic conditions, and make manual adjustments where needed to make sure your survey works correctly.
Export from Qualtrics
Before you can import your surveys into QUESTIONSTAR, you first need to export the relevant files from Qualtrics.
Two file types are needed for the import:
- Survey structure: file in .qsf format
- Response data: file in .csv format
Export the survey structure (.qsf)
- In Qualtrics, open the survey you want.
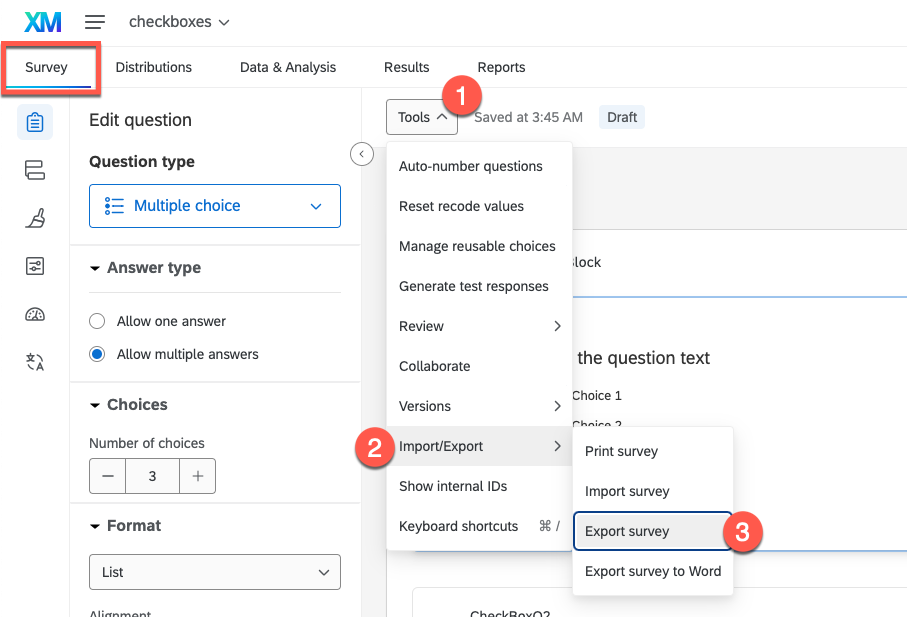
- In the top menu, select Tools ① → Import/Export ② → Export survey ③.
- Save the file in .qsf format to your computer.
The .qsf file contains all the information about the survey structure — that is, questions, answer options, page structure, display logic, and so on.
Export the survey data (.csv)
- In Qualtrics, open the Data & Analysis tab.
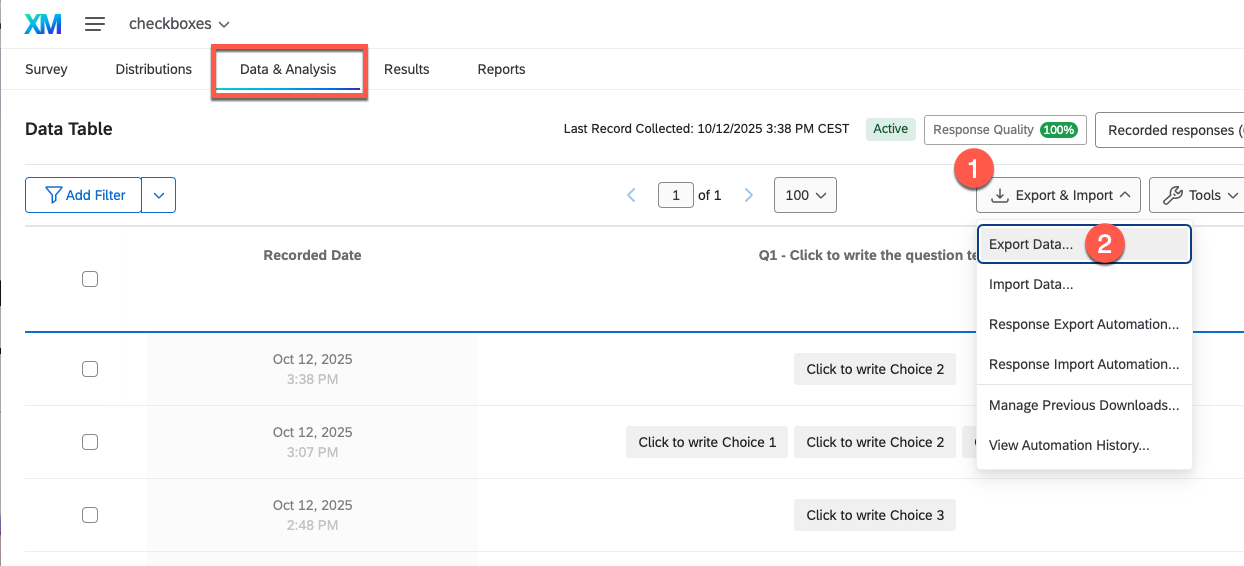
- Click Export & Import ① → Export Data… ②.
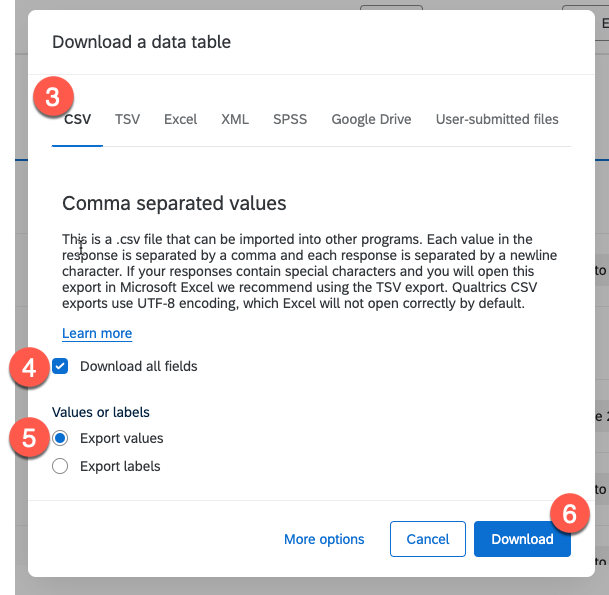
- In the export dialog, choose the CSV ③ format.
- Turn on the Download all fields ④ option.
- Under Values or labels, select Export values ⑤.
- Click Download ⑥ to save the file.
Note: Exporting the response data is not necessary if you only want to bring over the survey structure.
When exporting, always use the CSV format with "Export Values" so that QUESTIONSTAR can import the data correctly.
Import into QUESTIONSTAR
Once you've exported your .qsf (and, if needed, .csv) files from Qualtrics, you can import them into QUESTIONSTAR very easily.
Import the survey structure (.qsf)
In the top menu on the right, click your profile icon (①) and select Integrations (②) from the menu.
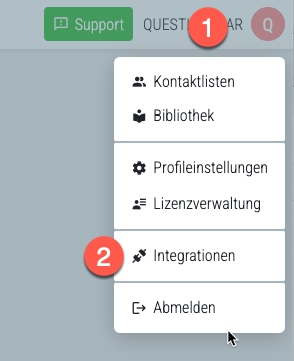
In the left menu, select Qualtrics to open the import view.
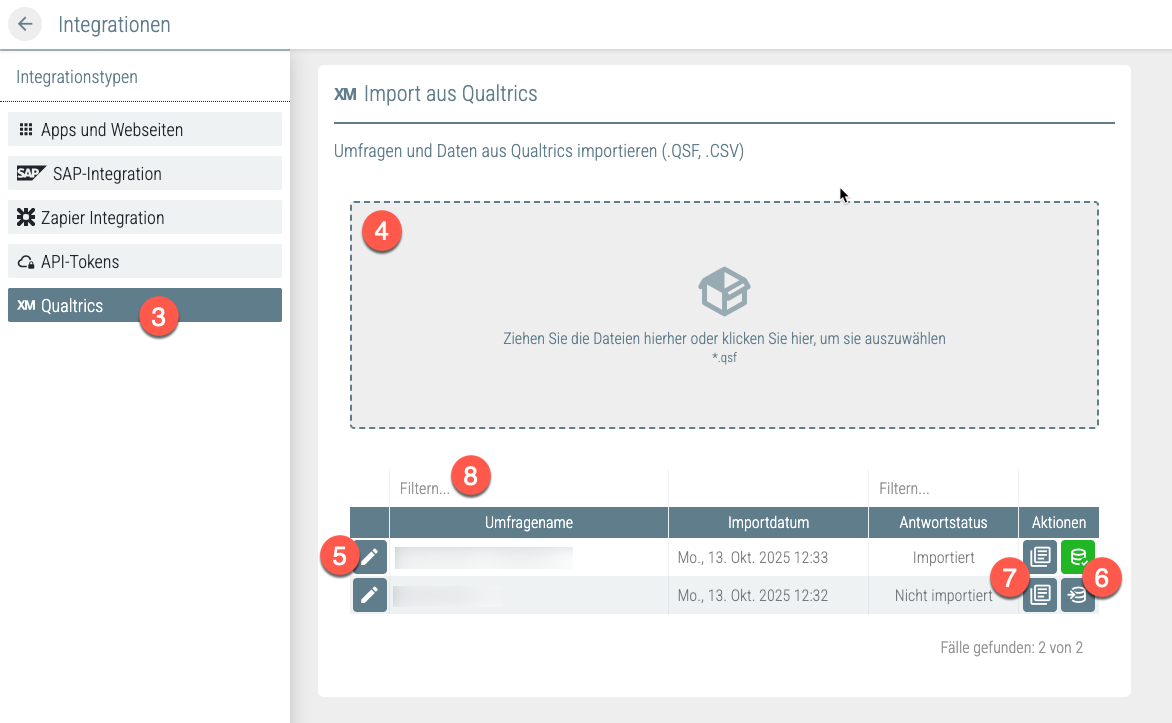
Drag your .qsf file into the upload field (④), or click the field to select the file manually.
You can upload several .qsf files at once.
The imported surveys then appear in a table. Using the buttons shown there, you can:
open the survey right away in the editor,
import the corresponding response data (.csv),
switch to the data view,
or filter or search the list of surveys by title.
Note: After the import, you should check your survey in QUESTIONSTAR.
Because there are differences between the question types and logic of Qualtrics and QUESTIONSTAR, some elements or logic conditions may need to be adjusted so that the survey works correctly.
Import the survey data (.csv)
Once you've imported the survey structure, you can, if needed, upload the corresponding survey data or responses to analyze them in QUESTIONSTAR.
To do so:
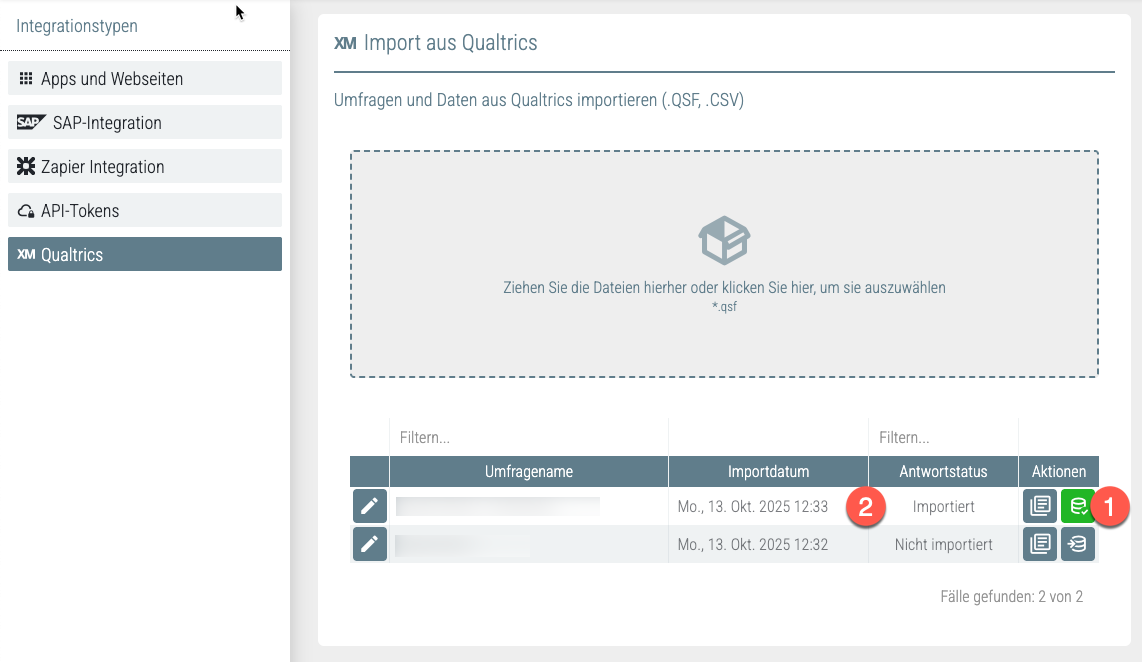
Click the "Import responses" button in the row with the title of the relevant survey and select the .csv file with the corresponding survey data.
Note: Please make sure you import the .csv file that belongs to the survey.
If the selected file doesn't match the survey, the system automatically shows a warning message.
After a successful import, the response status changes to "Imported". This way you can tell at a glance that the data has been uploaded successfully.
Note: If needed, you can import the data again.
When you do, the newly imported data is saved automatically and overwrites the previously imported records.
This means the old data is deleted.